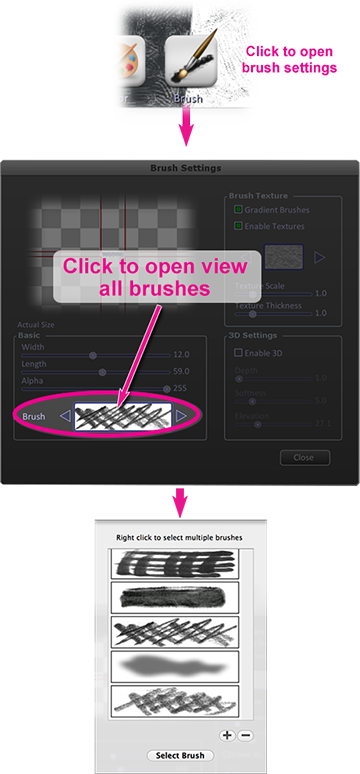
Textures and Brushes
This information only applies to the Bitmap Brush Style.
Appart from the Color Mode, and other basic parameters like width, length and transparency, the following properties affect how a GMX-PhotoPainter Style will look like:
- Brush Bitmap
- Texture
- 3D Brush
The Brush Bitmap
The brush of the bitmap it’s a crucial element that decides how a brush stroke will be. Using any of the Tools of GMX-PhotoPainter the bitmap brush will be deformed along a path that the Rendering Engine has calculated.
Depending on how the bitmap brushes are, they can be more appropriate to produce certain effects, for example if the bitmap brush is sharp and defined it’s likely that it’ll work better to render oil painting, while a very soft brush will work better to produce watercolor. If the bitmap brush is granular then it can be useful to produce crayon painting.
Creating a particular style it’s like an alchemy, it’s the art of finding a good combination of the transparency, brush bitmap, texture and other parameters.
Example done using different brushes
To change the current brush you have to click in the brush icon:
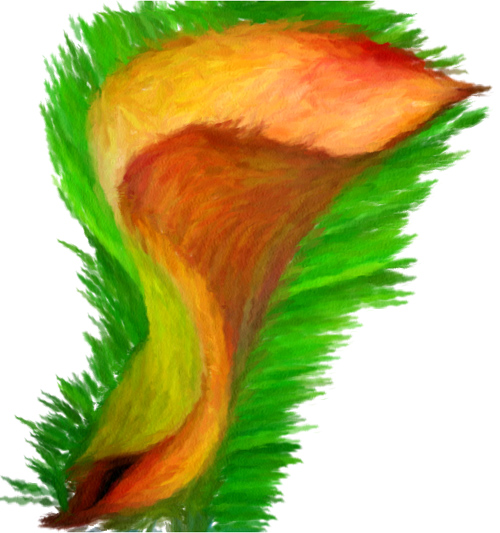
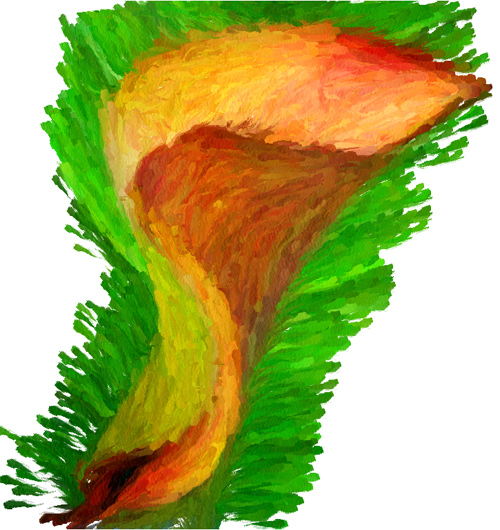
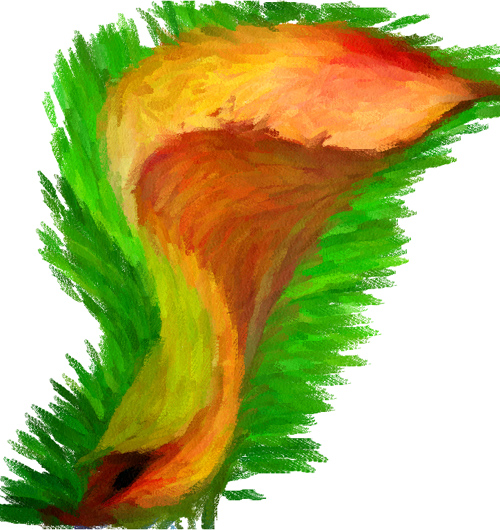
Below there are four examples of the same image painted with
4 different brushes:
Brush Number 1: 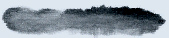
Brush Number 2: 
Brush Number 3: 
Brush Number 4: 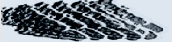
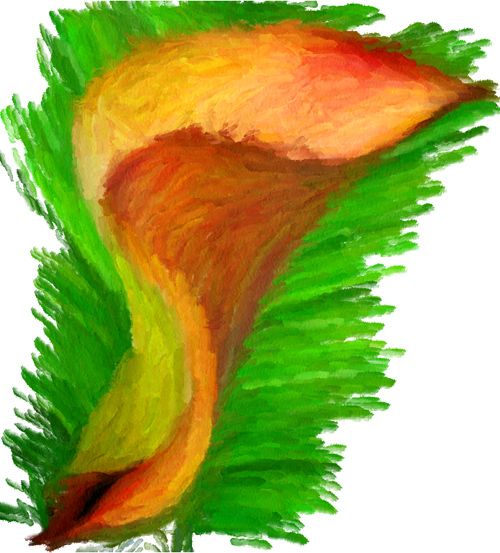
Painted with Brush Number 1
Painted with Brush Number 2
Painted with Brush Number 3
Painted with Brush Number 4
It’s important to note here that no other setting was changed, only the Bitmap Brush was changed.
Importing Your Own Brushes
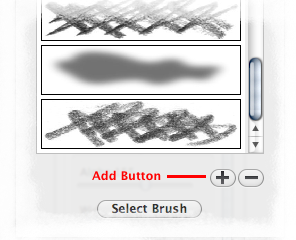
You can import your own brushes by clicking on the (+) button:
Now select the desired image:
Now you will see the new brush in the brushes browser
Note: There is no specific size of the image to be imported, but it must be something like 500×50 pixels or so.
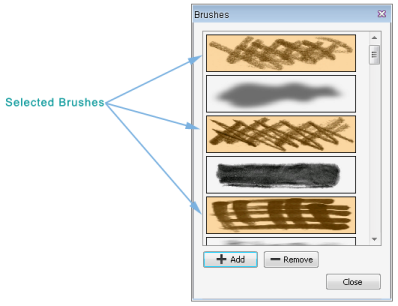
The Multiple Brushes Feature
This option let you specify more than one Brush in a given style. To enable this feature you have to Select Multiple Brushes by holding the “Control” Key while clicking on the desired Brush:
Texture
The texture it’s useful when you are trying to mimic the canvas texture.
To turn on the textures click in the “Enable Textures” checkmark under the brush settings window:
file:///Users/enieloud/Devel/wizardpaint/www.gertrudisgraphics.com/img/pen-and-ink-tutorial/enable-texture.png multiple brushes
You can change the current texture by clicking on the “Select” Button below the selected texture.
Once you’ve enabled it, you might want to choose a different texture:
file:///Users/enieloud/Devel/wizardpaint/www.gertrudisgraphics.com/img/pen-and-ink-tutorial/select-texture.png
Example
Below there are three examples of the same image painted without a pattern, and with 2 different patterns:
Texture Number 1 
Texture Number 2 

Painted with no texture
Painted with texture number 1

Painted with texture number 2
3D Brushes
It gives thick to the brushstrokes. To turn on 3D Brushes click in the “3D Brushes”:
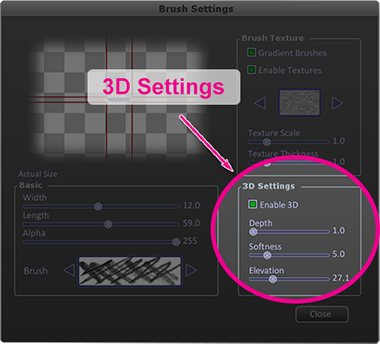
- Depth: As more depth, more notable is the effect, it can be attenuated by softness parameter.
- Softness: As more soft, less notable is the effect.
- Elevation: It changes the illumination of the 3D effect. If you don’t wan’t to change
the global brightness of the image, keep it between 29 and 36.
To let you compare, the following digital photo of a tiger was converted to a painting with no 3D effect:
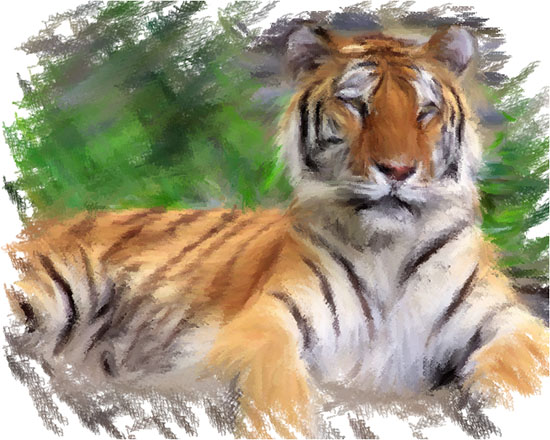
No 3D effect
The same digital photo was converted to a painting, but this time with the “3D Brushes” ON:
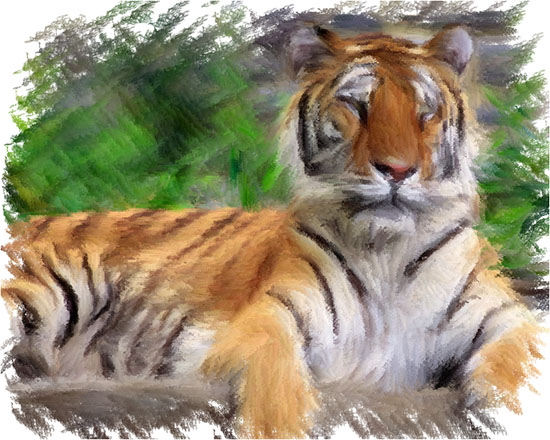
Depth: 8 / Softness: 3 / Elevation: 19
If you compare the settings of the previous drawing with the next one, you’ll be noticed that the depth in the next one is lower, but the 3D effect is slightly more notable than the previous one, this is because in the previous drawing the softness parameter is much higher than in the next one.
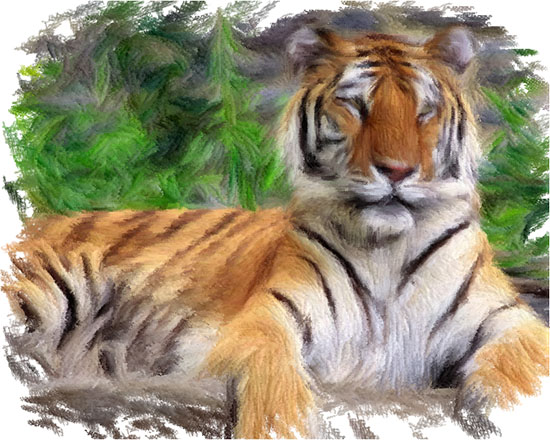
Depth: 12 / Softness: 3 / Elevation: 46
Gradient Brushes
There is an interesting feature in GMX named “Gradient Brushes”: If it’s checked, then each brush color won’t be solid, instead it will blend the starting color and ending color of the brushstroke. By seeing the following example, it becomes clear how it work:
